This page is designed to remind you what Accessibility Tools are available on Canvas, where to find them and how to use them.
We currently have four accessibility checkers available in Canvas. Checkers 1-2 only check the material in a content editor, thus must be run by editing each page, assignment, etc. Checkers 3-4 will scan material in content editors across the entire course. Checker 4 is the only one which will evaluate the accessibility of files uploaded into the course.
1. Canvas built-in accessibility checker
2. PopeTech accessibility checker
3. UDOIT accessibility checker
4. Ally accessibility reporting
Canvas built-in accessibility checker
You can find the tool on the bottom, right-hand side of the edited page with a icon of a person.
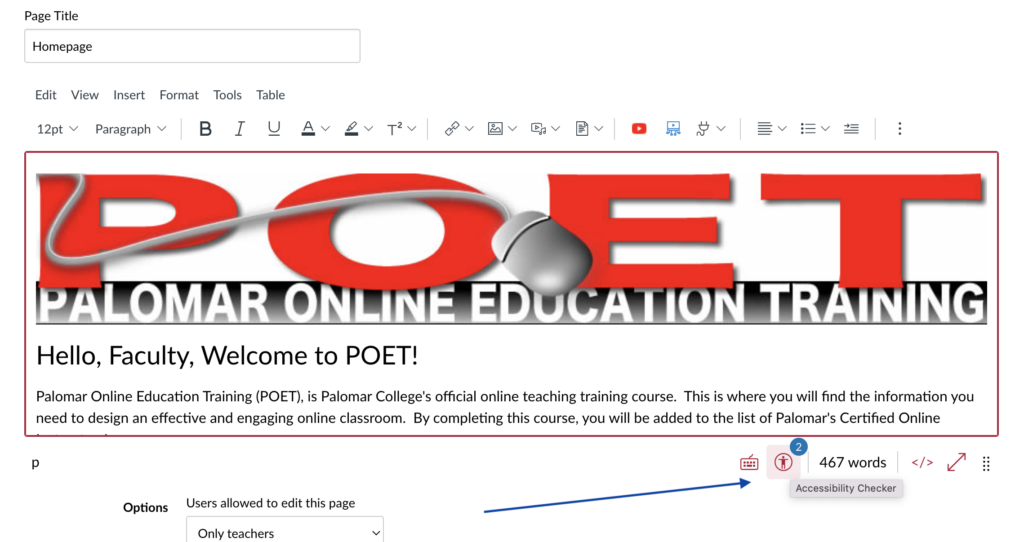
When you click the button, a box will pop up on the right-hand side of the Canvas page and it will outline the accessibility issues and help you resolve them.
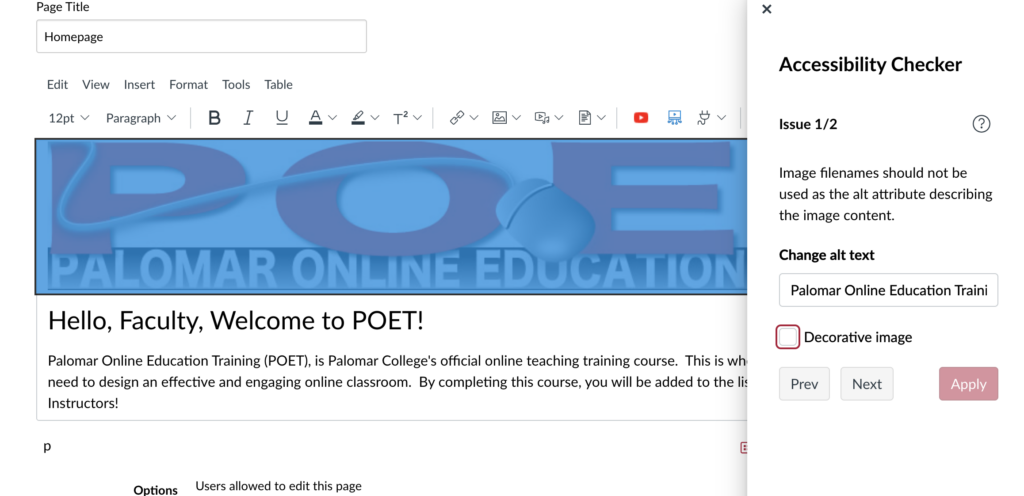
PopeTech accessibility checker
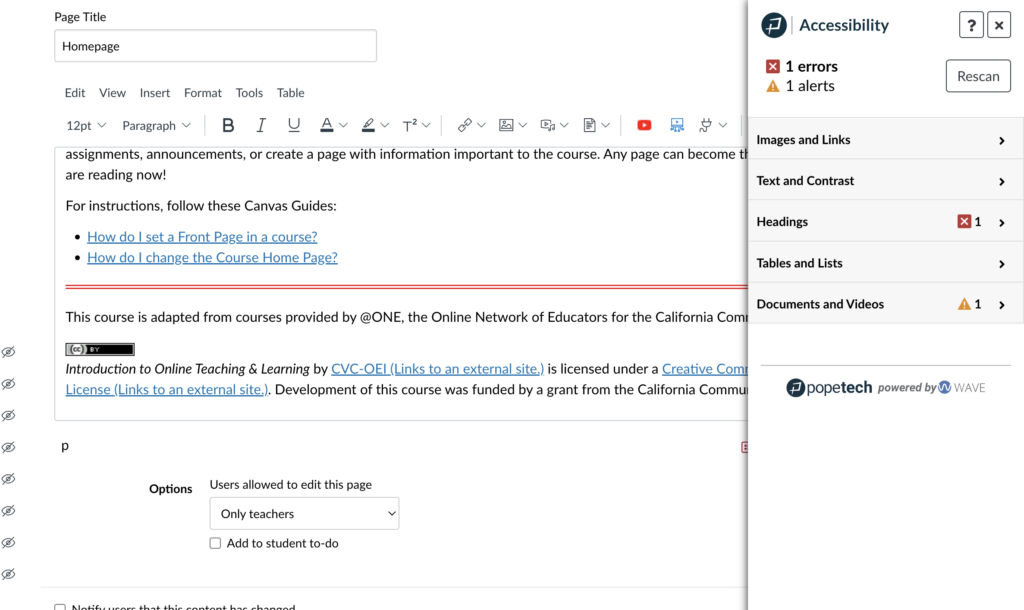
The PopeTech accessibility checker is also located on the bottom, right-hand side of the editing page near the Save button. The button has a P on it.
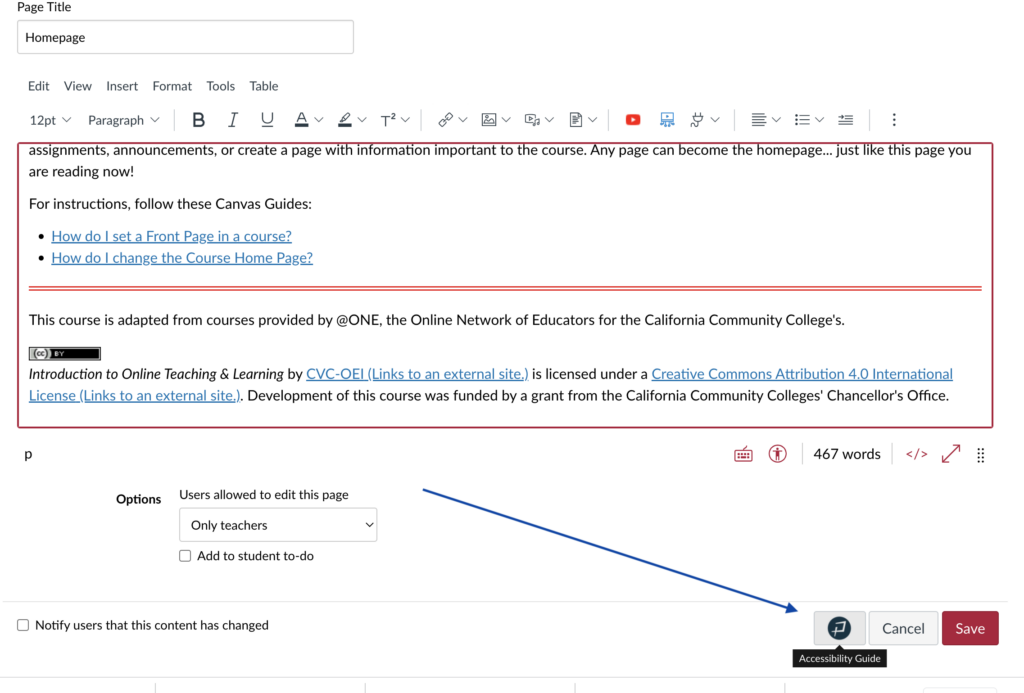
When you click on the PopeTech button, a new window pops up on the right-hand side that alerts you to any accessibility issues.
UDOIT accessibility checker
The UDOIT accessibility checker can be found when you are in a Canvas course but not editing a page. In some classes, you might need to go to Setting on the left-hand menu and then the Navigation tab to find the UDOIT tool.
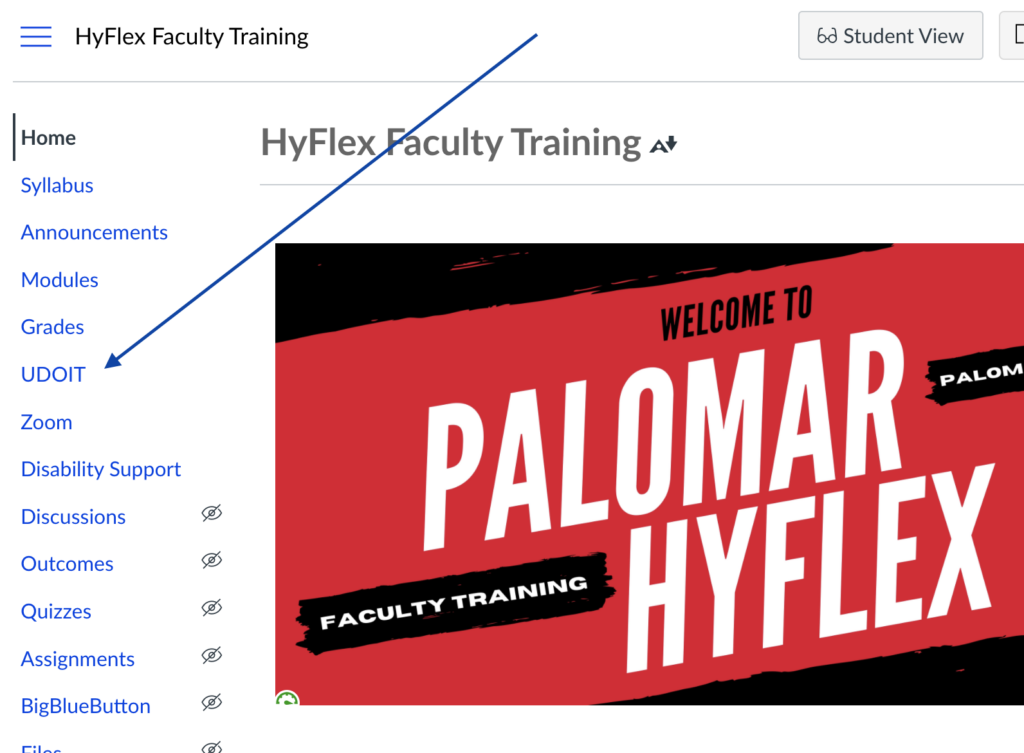
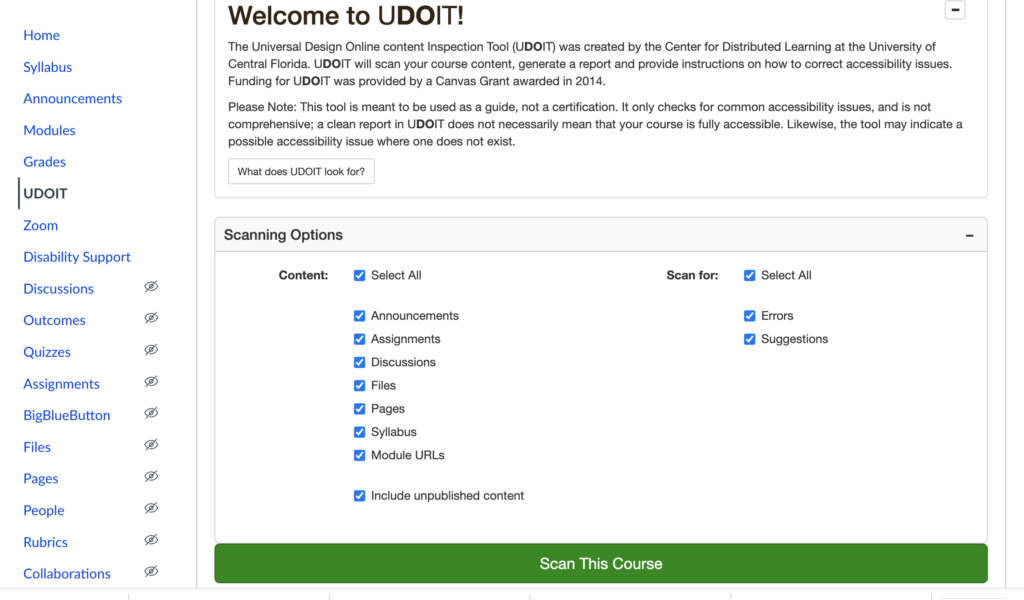
Once you click on the UDOIT, it will scan your entire course or only the areas you request.
Ally accessibility reporting
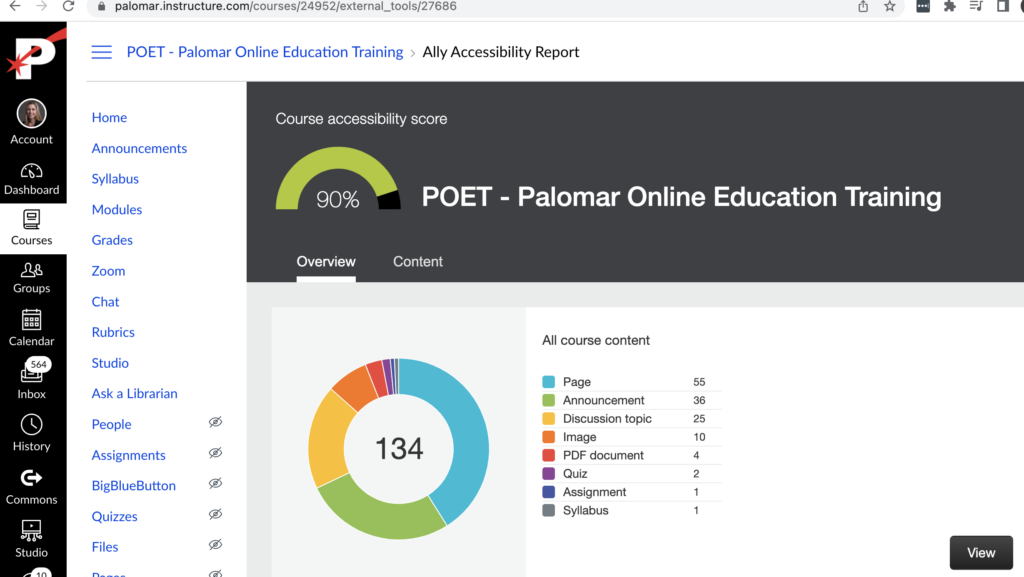
The Ally Accessibility Report can be found on the Canvas navigation bar when you are in your Canvas course. If you don’t see it, you need to go to the Settings menu item at the bottom of the left-hand menu. Then, click on Navigation and it will probably need to be dragged up from the bottom menu to the top menu.
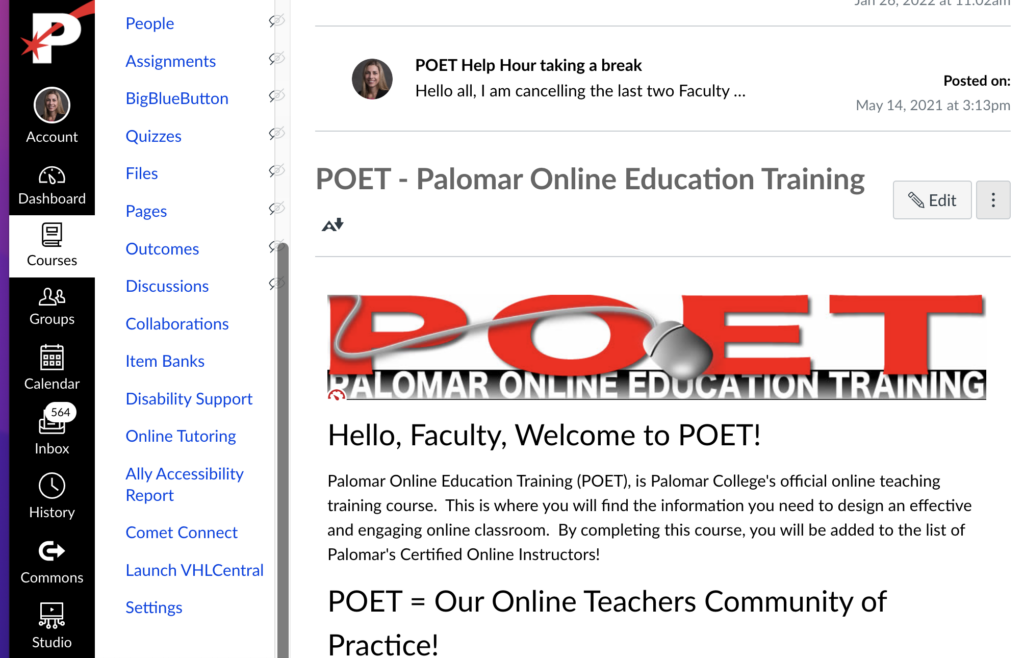
Once you see the Ally tool, click it to see your accessibility rating. Below the rating, you can see a button to fix the issues.
